iTunes, the Apple supported podium for music worshipers is much more than just a place to keep your own music library. Share iTunes music is one of its significant features and that’s where all the fun begins. You can not only manage your own music, but you can also share music on iTunes with others and have others’ share with you. You can also share music purchases among your family members on iTunes and lastly, you can do the sharing between computers. There are three fundamental ways on how to share music on iTunes.
Part 1: How to Share Music on iTunes to iPhone
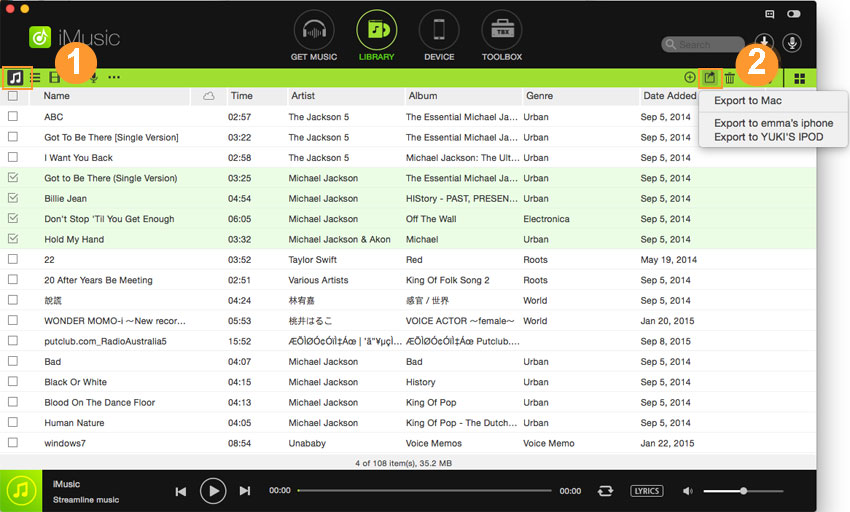
iMusic is preferred by many users to stream and transfer music from iTunes to devices, and vise versa. It lets you one click to share music from iTunes to iPhone, including purchases and non-purchases. What’s more, it comes with options to manage your iPhone music, so you can delete unwanted music, build playlists, or export music to Mac or iTunes. See below details guide on sharing iTunes music to iPhone:

Simple steps to share iTunes music
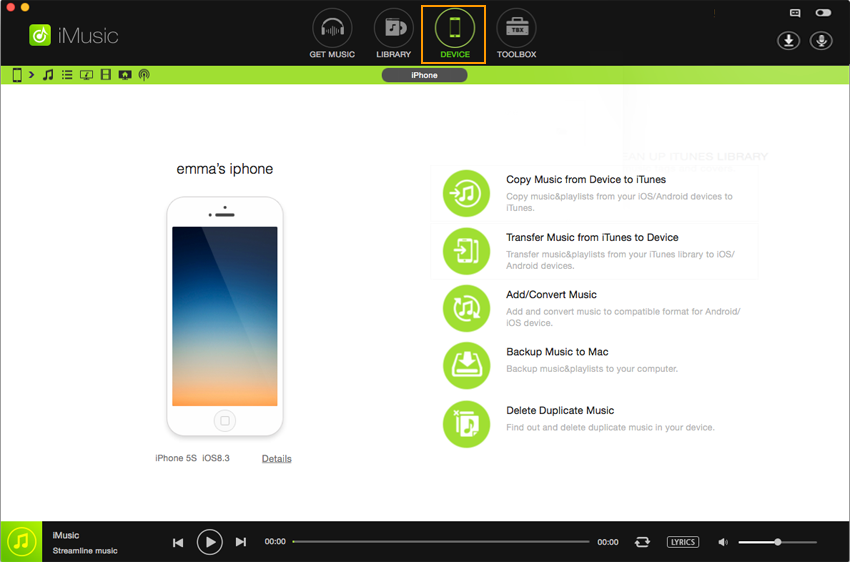
Step 1: Download iMusic on your Mac/PC, install and launch it. After then, use a USB cable to connect your iPhone. You see your iPhone appears in iMusic “DEVICE” window.
Step 2:
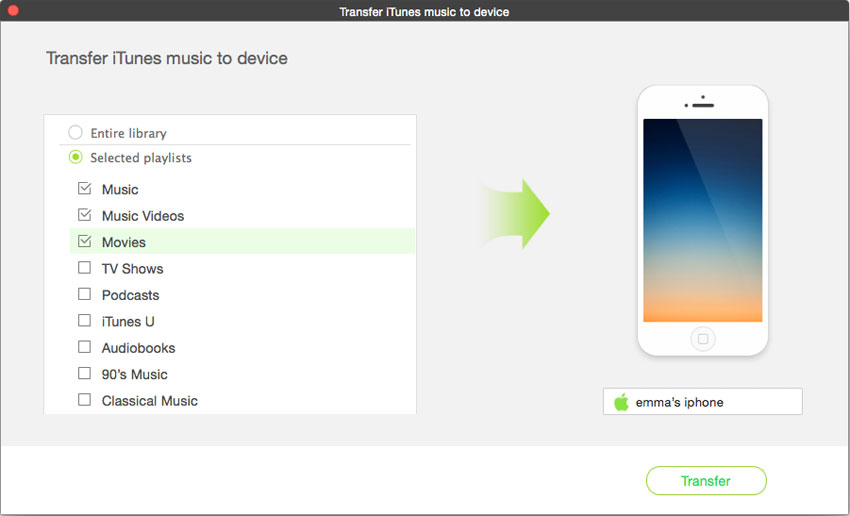
Option 1: In the main window of “DEVICE”, there is an option “Transfer Music from iTunes to Device”. Click it and then select file types you want to transfer. Check the file types and click “Transfer”. Please note, if you have a big iTunes Library, I suggest you option 2 – transfer selected songs.
Part 2: How to Share Music on iTunes with Family Sharing
The Family sharing feature on iTunes opens a window by which six people from your family can share your iTunes store purchases through shared accounts. You can pay for your family purchases as well as share your account with the kids to buy products from the same account. It is a rather good way of staying connected over the theme of music and getting to learn each others’ preferences and making suggestions. Getting started at it is easy:
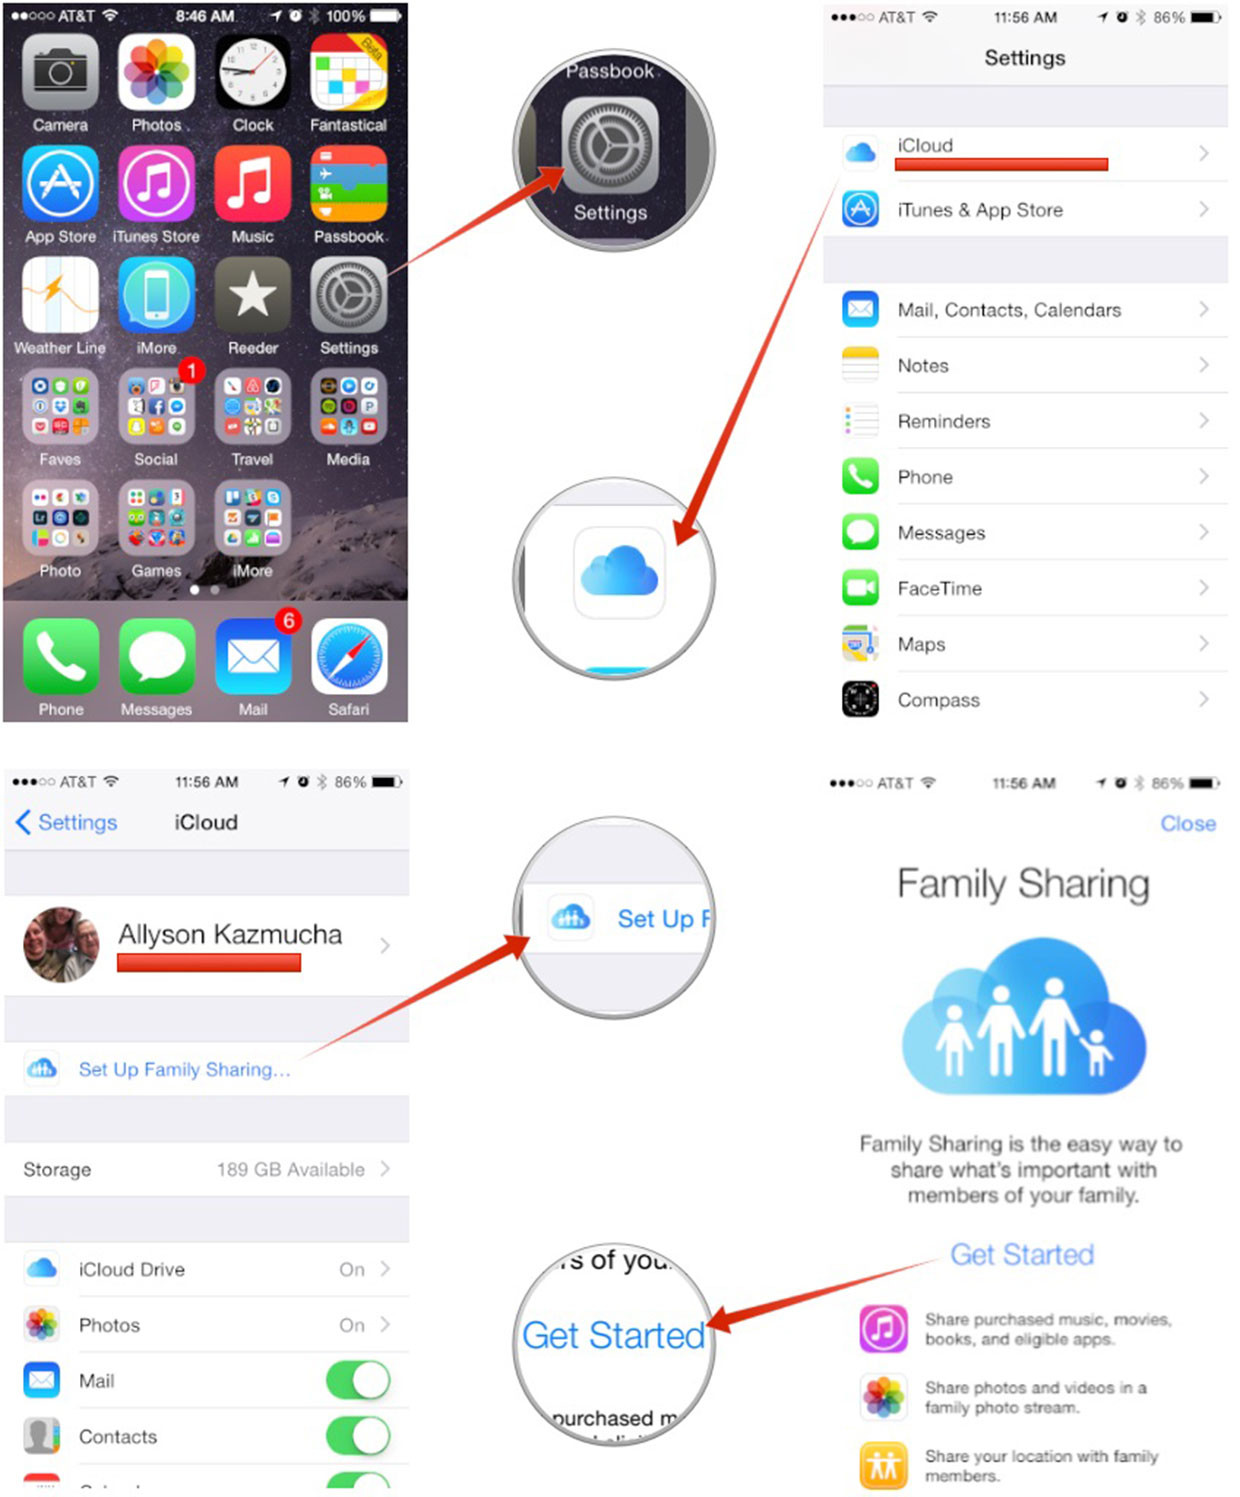
- Step 1: Set Family Sharing up. Send invites to a maximum of five people in the family.
- Step 2: By connecting with the invitees, you are agreeing to bear the expense of all purchases initiated by any member of the shared account.
- Step 3: They have to accept the invitation which ensures that the feature is set up in each of their devices.
- Step 4: As soon as an eligible purchase is made, the items get accessible to all in the group.
- Step 5: Find all the purchased products under the iTunes Purchased tab in each of the names.
- Step 6: Hit the name of the member whose collection you wish to browse.
- Step 7:Download the file and play in your device.
- Step 8:Select Hide Individual Items in order to keep some selected files private from access.
Part 3: How to Share Music on iTunes Between Computers
Home Sharing is the feature that can enable sharing iTunes content between multiple computers and sharing between accounts from one computer. Though this option, you can even transfer content from one library to another all on the home network. Right after, you can even stream music from the libraries accessed directly to your iOS and even your 2ndor 3rd generation Apple TV. Follow the steps here:
- Step 1: Go to iTunes. Find File from the top menu bar and go to Home Sharing.
- Step 2: Upon enabling it, you’ll require to enter your password and Apple ID.
- Step 3: Feed the credentials and select Turn On.
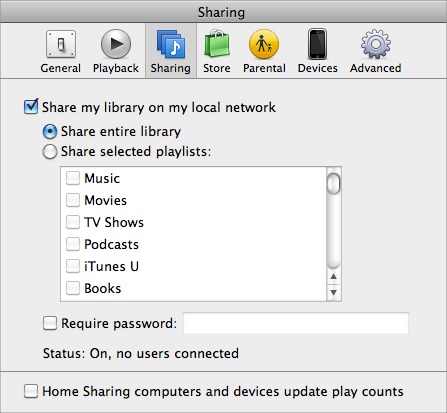
- Step 4: Now go to Settings on the lower-right corner.
- Step 5: Select the files you wish to share.
- Step 6: Turn on the Automatic Transfer option, which is turned off by default except when new purchases are made.
Part 4: How to Share Music on iTunes with Another User
This is easy and so much fun considering the fact that sharing leads to networking on iTunes. You can share your iTunes collection, even the entire library with others through this simple step by step process.
- Step 1: Close the iTunes application.
- Step 2: Access the Media Folder in ~>Music>iTunes.
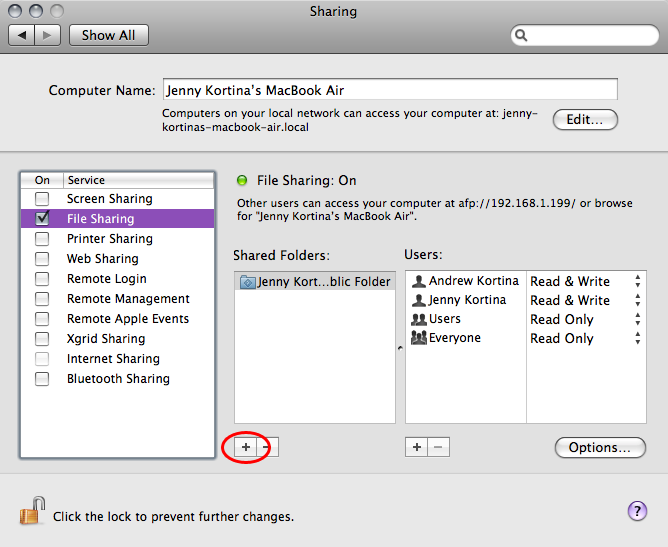
- Step 3: Now drag the folder to a location that is public.
- Step 4: Now launch iTunes. Go to Preferences and hit Advanced. Select the Change button.
- Step 5: Now access the Media Folder through the window that pops up. Click Open or Choose.


Any Product-related questions? Tweet us @iMusic_Studio to Get Support Directly