Music captures the heart and tames the soul. People love music and everything about it. We buy CDs, download tones, and listen to audio tracks in sites. Then, we realize, with the modern and high technology, we can be musicians of our own. This is where recording and editing software like Audacity comes in. With its interactive and visible features which are absolutely free, Audacity is the new star in audio recording and editing. This tutorial will give you more tips on Audacity recording.
Part 1: How to Record on Audacity
Audacity Audio Recording
Step1. Download the Audacity software at audacityteam.org. Click Download Audacity 2.1.1, which is the latest version for now. Run the installer and preferably, save it in your desktop for convenience.
Step2. If program is successfully installed, check your microphone if it's plugged in and functions well.
Step3. Verify the Audacity setting. Alter Preferences. The following are recommended settings:
- (1) Audio I/O >>> (2) [Mono (1) Recording Channels] >>> [OK]
- (1) Quality >>> (2)[22050 Hz] Default Sample Rate >>>[OK]
Step4. Next, click the Record button to start recording. Then, speak to the microphone.
Step5. This waveforms show that you are on the process of recording.
Step6. To stop the Audacity recording, click the Stop button.
Step7. You can add effects, depending on however you want the audio to be heard. You can explore on some complicated effects if you like. Remember; do not be afraid to navigate around. There is always an undo button for mistakes.
Step8. If you are done, export the file to whatever type of format you like and save it to your folder. Make sure to label each file for your convenience.
How to record Multi-track
Multi-track is recording more than two devices or instruments at the same time. This is one unique feature of Audacity making it appealing to the mass' taste.
Step 1. First step is just like recording an audio track. Click record button to start recording.
Step 2. Click the yellow button to stop. You can use the noise removal feature to clear the music with unnecessary noise.
Step 3. Then, to begin the second track, click the Record button again. Every time you click this red button, you are starting another recording. If it does not record, try going to Preferences and make sure to click the button that says Play other tracks while recording new one and you are good to go.
Step 4. Same procedure follows in stopping, playing back, adding effects, adjusting, and exporting your multi-track file recording.
How to Record on Skype
Audacity is not only limited to audio and multi-track recording; it can also record Skype calls and interviews. Amazing, right?
Step 1. In Audacity, click the main menu and go for Audacity and Preferences. Then, click Devices and check settings under Recording.
Step 2. Log in to Skype.
Step 3. It is advisable to turn off all notifications to suspend sounds that may interrupt the recording. So, go to Skype Preferences and Notifications. Uncheck the Play Sound box.
Step 4. To start the call, add a contact and enter the name and number. Double-click it to start the call.
Step 5. Click the record button in Audacity to start recording the call.
Step 6. Check if the blue lines in Audacity are moving to make sure recording is on the process.
Step 7. If done, click the Yellow Button to stop recording. Export and save the file. Also, don't forget to end your call in Skype by clicking the Hang Up button.
Part 2: Troubleshooting on Audacity Not Recording
Problem 1. No sound registration during recording
If the blue waveforms are not moving and only a straight line is seen, this indicates no sound is recording. What you will do is inspect the connection of your microphone and double check its settings. Go to the Start button and go further to the Control Panel. Select Audio and Sounds Devices and click Volume. Select Advanced selection and proceed to the next window that opens, select Options and then, Properties. Click Recording and OK. Below the Microphone, check adjacent to Select. Boost the volume of the Microphone above zero level. Then, try recording again.
Problem 2. No Sound during Playback
Click the Volume or Speaker symbol to make sure your computer's settings are positioned to the proper level. Raise the volume bar above zero level or according to your preference. If no sound is still heard, alter the physical volume power handle of your computer or speakers. You can also do the adjustments on Audacity itself. Click Effects and Amplify.
Problem 3. Crackling Sounds in High-Volume Playing
Warping and high frequency sound effects are heard during playing back in very high volume and the blue waveform is moving to the top or bottom of the recording space. This issue is called Clipping.
You have to lessen the volume of your personal stereo, microphone, and other devices used in recording. Devices have their own volume settings so check them if they are in the proper level, not too soft, not too loud. You can also lower the record level through Audacity's I/O Sliders.
Problem 4. Recording Pointer not Functioning
When recording and the red cursor is not moving according to your command, this could denote that your computer has inadequate resources for recording or editing process. You can restart your computer to fix this.
Problem 5. Bad Recording Quality and Inclusion of Surrounding Noise
Poor value in recording could mean deficient software and hardware of your computer. A vital hardware of a computer is microphone so you must save for a good one. Also, sound cards built in laptops and computers are not all high-performing when it comes to recording. You can replace yours with a high-quality one.
Environmental noise can be controlled by recording in a close area away from a number of people. You can also record late at night where people are sleeping and lesser vehicles are at the street to avoid unnecessary sounds.
Part 3: How to Record Audio with Audacity Alternative
Yes, I know. Audacity is purely amazing with all those features you can't find in any other recording and editing software. But you can also explore and utilize an Audacity Alternative, specifically iMusic. It is equally-amazing with Audacity and allows you to record unlimited online tunes from Spotify, Google Play, Pandora, Yahoo Music, MySpace, iTunes Radio and more to your hard drive, acquire tune information, and play recorded tracks on your Mac in just a click of a mouse!
It also flaunts the following features:
- 500+ tune sites and radio stations are sustained.
- Automatic identification of music information such as title, artist's name, album, genre, year, etc. through ID3 Tag Support.
- Eradication of ads and pop ups during recording.
- Automatic track splitting and audio or sound file separation.
- Allows online video recording in Youtube.

Steps to Record with Audacity Alternative
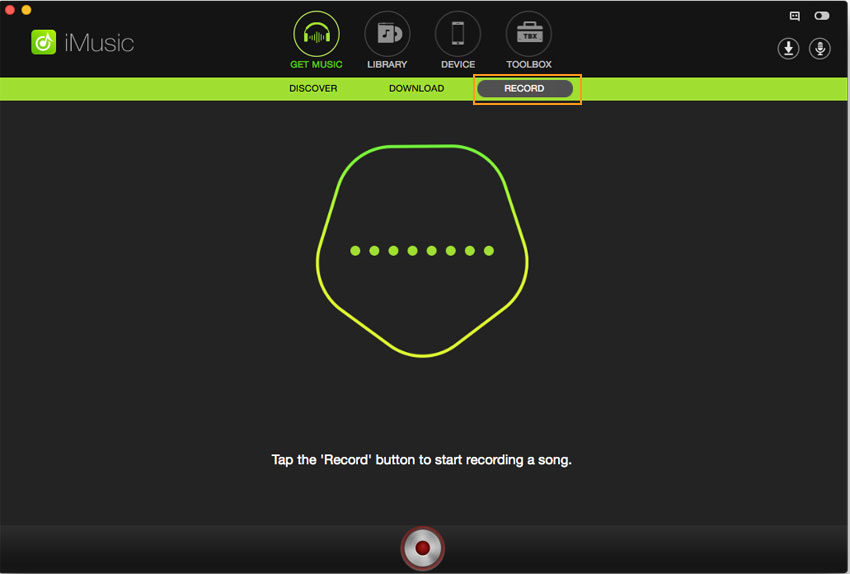
Step 1: Download the application and follow the installation instructions to install it. Launch the program. Click the RECORD tap and press the red button to get ready to record music.
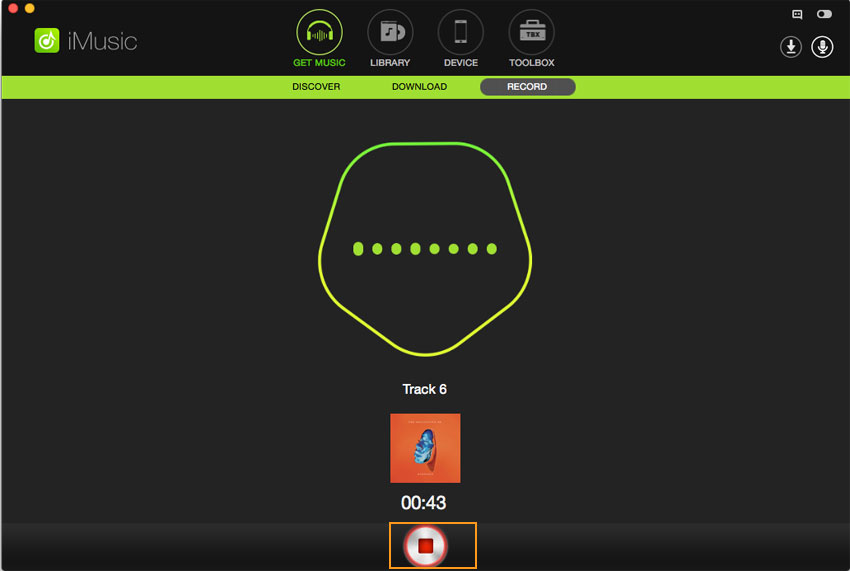
Step 2: Then go to the audio or video you want to record. Play the audio or video. The application will begin to record only upon detection of the sound. Meanwhile you don't have to look after it. Press the red button again to stop recording if you want it to stop.
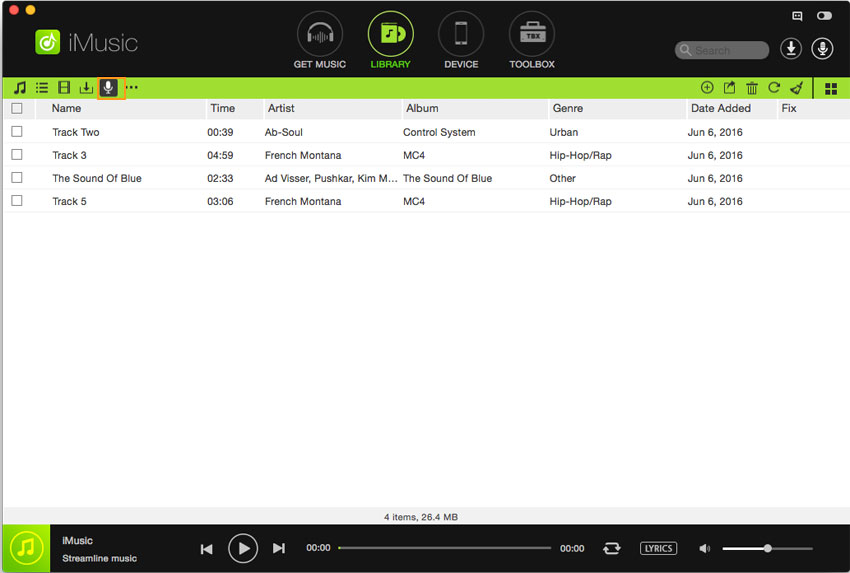
Step 3: To listen the recorded music, you can simple click LIBRARY tap to check them. And you can transfer them to your computer or other devices connecting to your computer by USB cable. You can transfer them to your iTunes Library too!


Any Product-related questions? Tweet us @iMusic_Studio to Get Support Directly