The joy of upgrading to a brand new computer also ends up giving you grief later on when you have to transfer the entire iTunes Library to it. However, the process does not have to be extremely complicated as we have underlined 3 important, but very ‘simple to follow’ methods on how you can effortlessly transfer your iTunes Library to a brand new computer.
Part 1: Easiest way to transfer your iTunes Library is using a program - iMusic
iMusic is available for both Windows and Mac OS X, so you will not run into operating system compatibility issues as far as this program is concerned. Before downloading, installing and firing up iMusic, making sure that you have iTunes installed for either your Windows or your Mac OS-powered machine (both and new). Click here to download iTunes for Windows or iTunes for Mac OS
The beauty of using iMusic is that it features its own backup and restores functionality. This feature alone allows you to either backup or restore your iTunes Media library. While you will still need an external form of storage to restore the contents on the newer computer, having an element in between reduces time and effort by a huge margin.
How to backup iTunes Library and restore it to a new computer?
Before backing up your entire iTunes Library, find the location of its folder. By default, the iTunes Media folder will be located as follows:
- Windows 10: Users\username\Music\
- Mac OS: Use Finder app > username > Music
If you cannot find the folder there, then follow the steps given below:
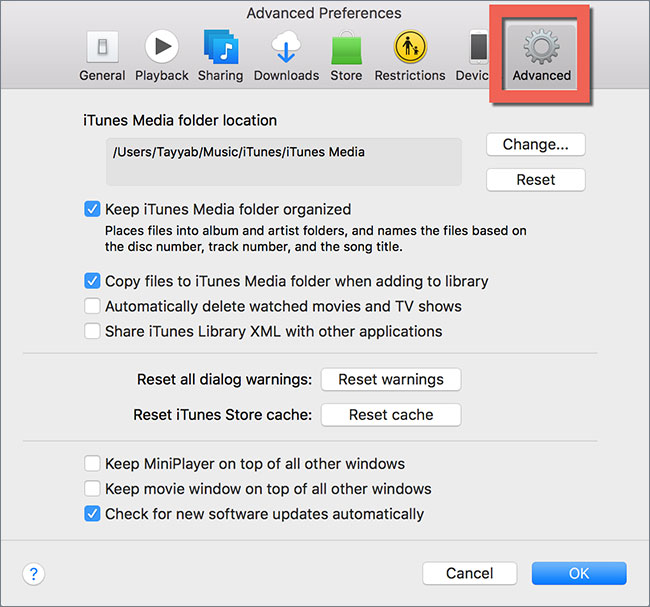
Open iTunes and from the top of the menu bar, click on Preferences (on a Mac it can be found under iTunes. For a Windows machine, follow the path Edit < Preferences). Now, click on the ‘Advanced’ option and look in the box titled ‘iTunes Media folder location’.
How to collect and transfer files using iMusic
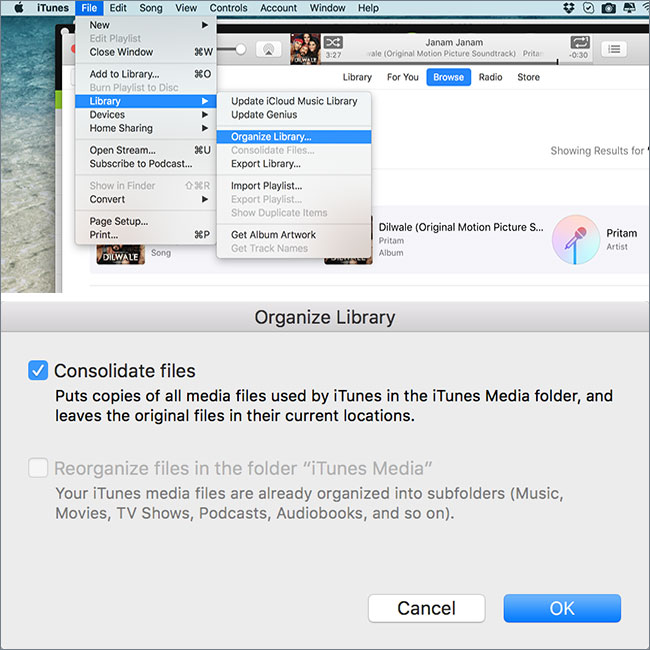
Step 1: After that, you should consolidate all of your media into the iTunes Media folder. To consolidate your media, first open up iTunes. Look at the menu bar at the of the iTunes window and follow the given path: File > Library > Organize Library. Now select ‘Consolidate files’.
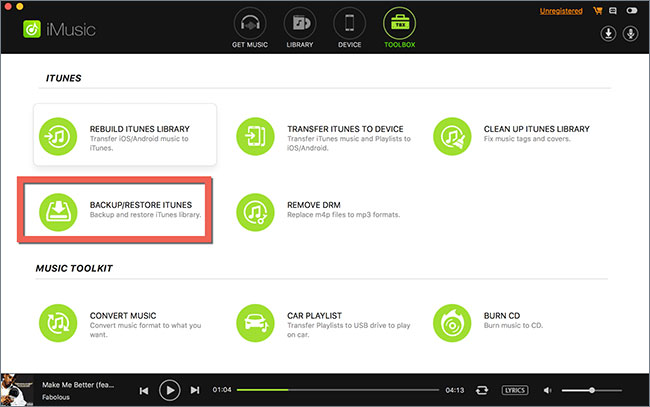
Step 2: Open the iMusic application you installed earlier, and on the top of the application, you should see the option titled ‘Toolbox’.
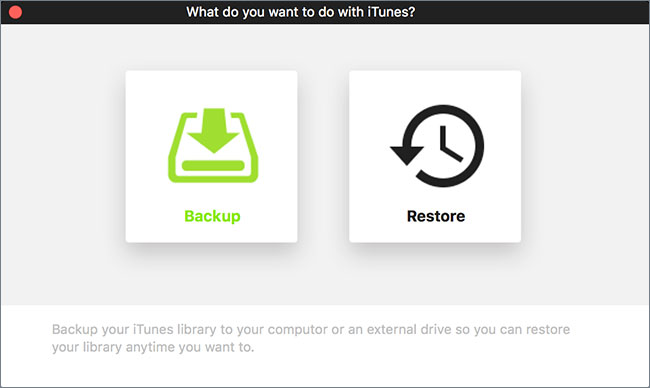
Step 3:Tap on Backup/Restore iTunes and after selecting the ‘Backup’ option, it will ask you to select the contents that you want to backup as well as to provide a file path for that particular backup.
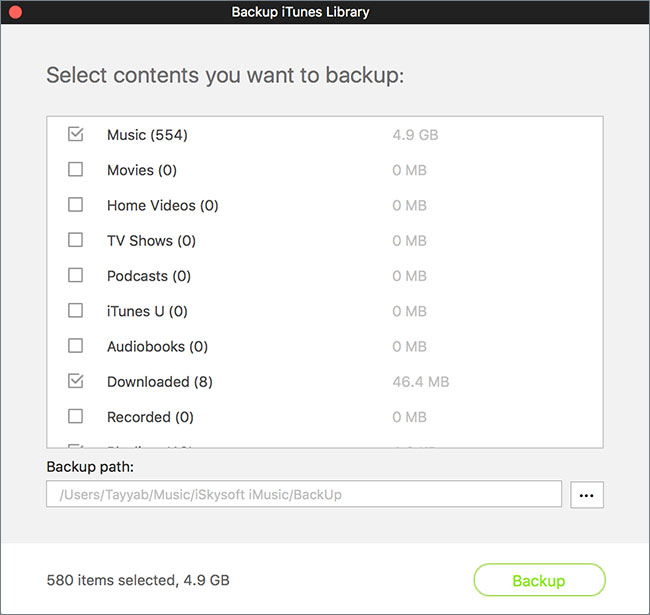
Step 4: Using the path, you just selected, keep a spare USB flash drive or an external hard drive in possession and copy the backup or your iTunes Media Library onto the storage medium for later use.
Transfer the iTunes Media Library to the new computer using iMusic
- Keep the USB flash drive or external hard disk in safe place before restoring the iTunes Media Library.
- Download, install and run iMusic on the new computer.
- When running iMusic, click on the option ‘Toolbox’ once more.
- Click on Backup/Restore iTunes and select the Restore option this time. Using your USB flash drive or external hard drive, copy the iTunes Media Library onto the new computer before selecting the file through iMusic.
- Remember to copy the content in a place where you will remember the path when asked by iMusic.
- After clicking on ‘Choose’, you can select what content to restore from the backup.
- It will also ask you to delete the current iTunes library before restoring the backup. Preferably, you should delete the backup because you will be adding more files to iTunes later one.
Part 2: Restore iTunes from old to new computer through a hard drive
Keep an external hard drive or a USB flash drive connected to your computer. Preferably, it is advised to use a USB flash drive since the external drive’s cable will wear out overtime and might interfere with the transfer progress.
Transfer the iTunes Media Library to the new computer using iMusic
- To copy iTunes content to an external drive or USB drive, open it up so it looks like a regular folder
- Highlight things present in your iTunes library. To highlight one song, you can click on it and to highlight a whole list, click the first song, then hold down the Shift key and hold the last key
- Once you have selected your choice, just ‘drag and drop’ them to the folder and you are done
- When you want to transfer the copied content to the other computer, make sure it has iTunes installed on it
- Using the external storage, highlight all the content you want to copy on iTunes running in the new computer and use the ‘drag and drop’ method to complete this step

- Using the migration process, you can restore the old iTunes library and make it appear on your new computer once again.
- Locate the external drive or USB flash drive on your old computer and copy the files after the consolidation process have been completed through the iTunes application.
- ‘Drag and drop’ the iTunes Media folder onto the external drive or USB flash drive.
- Now plug in the storage peripheral in the new computer and fire up iTunes.
-
Copy the iTunes Media folder from the storage and copy it onto the existing iTunes folder of the new computer. If you want to know where the existing iTunes Media folder is present, locate it in the following:
o Windows 10: Users\username\Music\
o Mac OS: Use Finder app > username > Music - When you open up iTunes once again, it will refresh the library with the new content that you just copied on the new computer.

Here were some ways that you can effortlessly transfer the iTunes Media Library to a brand new computer. Though using iMusic is the simplest method to follow, each user is accustomed to his/her own ways.


Any Product-related questions? Tweet us @iMusic_Studio to Get Support Directly